Showing posts with label Click here for all "Cat" lessons. Show all posts

Tuesday, 29 March 2016

Last Lesson for our Cats Painting

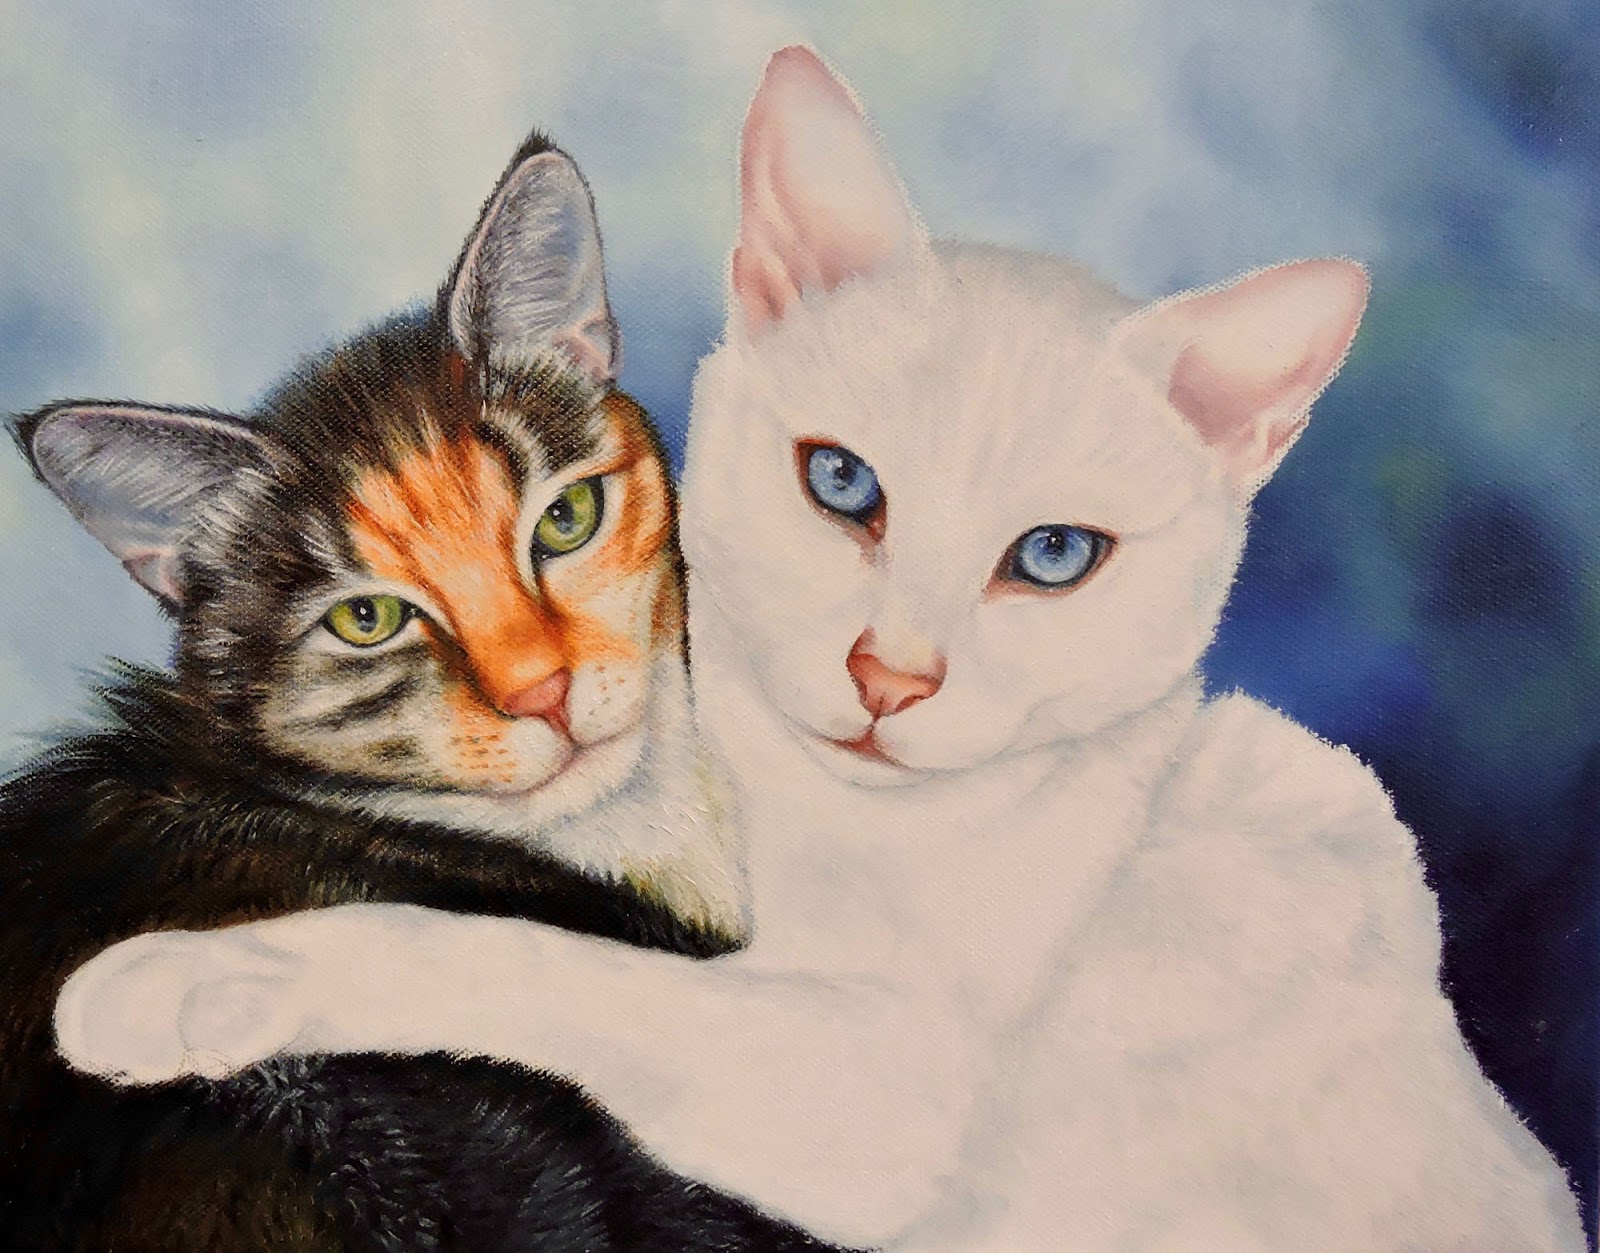
Well in this, our last lesson, we went over all the edges of the white cat's fur, softening and flicking out across that hard edge.  I painted in the cat's claws with a dark mix of Ultramarine Blue and Cadmium Red, and put some soft purple shadows underneath.

Sorry but I don't have the final photo of my finished painting, as I sold it before I got around to photographing it!  Never mind, I'll just have to paint another one!  I called it "Gracie's Cats" and Grace told me she has heaps more photos of these two to do.

Friday, 11 March 2016

Lesson No.12 - Give Your White Cat Depth and Solidity

We're working on the edges of the cat today.  Objects can be lighter as they come toward you, and darker as they recede.  So as the hair of the cat recedes into the background, the hair is darker and softer at the edges.  Where the background is lighter, (in my case the top of the head), mix one or two shades darker with your background colours and using a fine brush and a bit of Liquin or flow medium, flick out through the hard white edge into the background so it is just visible.  Similarly, with the darker areas of the background (my cat's back) make the mix one or two shades lighter and flick through the edge with this.

Once done, you will have a fluffy blue-edged cat but don't worry, we haven't finished yet.  Load up your fine brush with white and flick through the blue hair and softly into the background.  You'll have to wipe off your brush constantly as you will be picking up blue paint on the way.

Saturday, 5 March 2016

Lesson No.11 - How to Give Whites Depth and Shape in Oils

We use the same techniques when painting the white cat but with different colours of course.  So remember to paint in the direction of the hair growth, darks first, highlights last.  Block in the different tones with a larger filbert first, then go over the details in a fine brush with Liquin added to the mix.  The tip here is that white colours reflect the surrounding background colours - don't be afraid to use some of those blues and greens from the background and oranges reflected off the other cat.  This will help give the cat shape and depth.

Monday, 29 February 2016

Lesson No.10 - How to Give Black Depth in Oils

Black tends to be very flat on it's own, so I usually mix Ultramarine Blue, Cadmium Red and a dot of Lemon Yellow for the darks first.  This allows for colourful darks and highlights.  To create depth in the fur, I then use a black with a bit of Ultramarine mixed into it.  Black also reflects background colours, so I used my background colours in my highlights.  The hair on the cat's back is done in a mid-tone dark Pthalo Blue to indicate the curve of his back.

Thursday, 18 February 2016

Lesson No. 9 - Creating that 3D Effect

We are continuing on with the face, remembering the direction of hair growth.  Darks first, then highlights and lastly whites.  Notice that around the edges of the cats face, the hair is very soft and out-of-focus.  I used a medium-tone blue to flick the hair out into the background to achieve this.  By softening the edges, the cat appears more solid, giving her a 3D effect.

Saturday, 13 February 2016

Lesson No.8 - Painting the Second Coat of our Cat

It's time to go over our turpsy wash with a nice thick layer of paint.  I'm using a fine brush now, loaded with paint for texture.  I start with the white patches first so that they don't get too muddy, then move on to the oranges, then darker greys.  If it is blobbing too much, add a small amount of Liquin or flow medium to your mix.

Sunday, 17 January 2016

Lesson No.7 - How to Paint Cat Fur


I painted over the entire cat with a turpsy wash.  Use a medium sized bristle brush for that scratchy texture.  In this initial wash, you decide on the direction of hair growth and what colours you would like to use.

Tuesday, 5 January 2016

Finishing the Cats' Ears


Now that we have our base colours down, it's time to get out our fine brush and Liquin and go all over the ears with some hair.

For the dark cat, I used Ultramarine Blue with a dot of Cadmium Red and some white, to go around the ears.  This colour softens the edges into the background before flicking black straight from the tube through.

For the white cat, I used the same colours, only more pink-purple, then flicked pure white through.

Tuesday, 29 December 2015

Lesson No.5 - Painting the Cat's Ears


I always make the mistake of not painting the ear holes dark enough.  As the ear emerges from behind the head, gradually make them lighter to give that slightly translucent look in the middle. 

Friday, 11 December 2015

Lesson No.4 - Painting the Cats' Pink Little Noses

I'm using Cadmium Red and Ultramarine Blue for their noses, mouths and around the white cat's eyes.  Darks first, then highlights.  Keep the brushstrokes nice and smooth as opposed to their hair which will be rough and textured. 

Friday, 27 November 2015

Lesson No.3 - The Eyes Have It!

The eyes of an animal portrait are usually the most important part of the painting - that's why I paint them first.  I had fun with these eyes, using whatever colours I wanted.  Cats have such beautifully varied eyes - some are pastel, whilst some can be incredibly intense.

Paint in the colour first with the highlight, then use the darker hue to go under the lid and around the pupil.  I firstly do the pupil in my dark shadow colour - Ultramarine Blue and Cadmium Red - then go over the darkest darks in black when I am happy with the result (otherwise black can muddy up your colours if you introduce it too early). 

Dots of highlights are added gently (usually reflecting the background colours) then just pure white on top of these.

Wednesday, 25 November 2015

How to Paint a Quick and Easy Background in Oils - Lesson No.2

There isn't a lot of background in this painting, so we need to keep it simple and soft so that all our attention will be on the cats.

I decided on a blue/aqua theme, but it could be any colour as one cat is grey and the other white.  On my palette I mixed a very dark blue-green, a mid blue, a very light blue and a very light lemon.  I used Prussian Blue and Lemon which I thought was rather pretty.  I dabbed in the darks first, then mid-tones, light blues and lastly filled in all the gaps with the lemon mix.  Then it's just a matter of feathering it all off gently so that it is very soft and out-of-focus. 

A bit more feathering off with a soft, dry brush and I'm done.

Wednesday, 11 November 2015

Learn How to Oil Paint Cats

Well, here is our newest challenge!  A lovely photo of Grace's two cats having a cuddle in the laundry basket.  I find animals the easiest to paint as they don't have to look exactly like the subject (unlike a portrait of someone), they can vary in colour a great deal, and hair can be very forgiving. 

So here's the drawing.  The faces are the most important part of the painting, so just make sure the eyes, nose and mouth are in the right spot and are the right size and distance from each other.